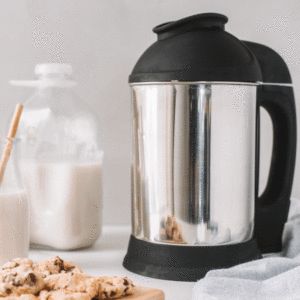
Almond Cow Review
It took me a while to get used to using the Almond Cow”, but now I feel comfortable enough to write an Almond Cow review for this amazing dairy free milk maker!
I bought my Almond Cow a little over a year ago, and it’s now my most used kitchen appliance.
First, in case you have never heard of the Almond Cow, the Almond Cow is a completely enclosed system that grinds any nut, seed or grain into “milk” without the need to strain out the solids afterwards. Also, it is done in less than three minutes!
I had never made my own nut milk before I bought an Almond Cow, and the milk is definitely different from what you buy in the store and takes a little getting used to. Most of the recipes call for adding dates or maple syrup for sweetness. I make mine plain so I can use it in all recipes. You can always add sweetener later.
First, the cost.
The Almond Cow is not cheap. Actually, it’s a pretty expensive kitchen appliance. So if you’re not committed to making and using your own nut milk on a regular basis, it probably wouldn’t be worth the cost to you.
Just buying the Almond Cow itself, is $195.00. They now offer a package you can buy for $279.00 which includes a bottle and brush, almonds, cashews, coconut and oats. You save $6.75 from buying everything separate. Although convenient, I don’t really see the bargain with purchasing all this, especially since I don’t know the quality of the nuts and oats. If you shop around at whole sale clubs and even grocery stores (like I do), you can find them much cheaper.
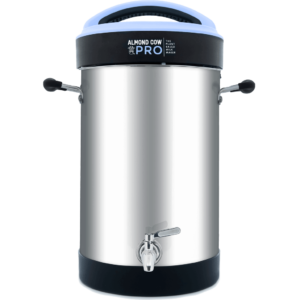
For coffee shop owner’s, there is a professional model that makes up to 2 gallons for $995.00. This seems expensive, but for the added advertising of how you are doing your part to save the planet, it would be so worth it. More and more people want plant milks in their coffees and cappuccinos. You could make your own blends and creamers. Besides it would be a tax write off.
As far as using the Almond Cow, it really is as easy as advertised!
The fact that you don’t have to manually strain the milk such as in using a nut bag, is a gem in itself. Nut bags can be a real pain to clean.
There are so many recipes, but I suggest that you begin with basic milks for your own drinking and baking uses. I don’t drink milk as a beverage, but I do use it in recipes and hot beverages. When I make milk, I always soak my nuts, but they say you don’t have to. I tried it without soaking, and I thought it came out very watery. Even running it twice, it just wasn’t creamy like I wanted it to be. So I soak them.
As I mentioned before, I don’t add any sweeteners or flavorings normally, just a pinch of kosher salt. Salt acts as a preservative. This is a personal preference.
I’ve also had trouble with coconut milk. I love coconut everything, but the milk always comes out watery. I tried it with cold water, hot water, mixing it with cashews, even just using the collector cup with only 500mls, and it still didn’t come out like I wanted it to. There are a lot of recipes that include coconut, so I will keep trying…
I also tried creamers because I have been know to buy them, but I really didn’t see much difference in consistency between them and my milk.
There is a huge difference!
The store bought milks all have additives which make their consistency very creamy. Your homemade milk is thinner and separates easily. It can be quite unnerving when you open your fridge and see your bottle of milk with a big amount of “stuff” on the bottom! A quick shake, and it’s back in solution.
Some folks complain that the milk is gritty in coffee or tea, but that is just part of the experience. If you do find it gritty, it will settle out, so just don’t drink the last bit in the bottom of the cup. I use the milk in my tea, and I only use loose leaf tea, so I don’t drink that last dreg in the cup anyway, which usually has a little bit of tea leaves in it too.
I have seen that many people have problems with the basket falling off and getting torn.
I have not experienced that, and I hope I don’t jinx myself by saying that. I will say that the “catch” for the basket attaching to the motor base is not the best design, but as long as you make sure it’s on correctly, you shouldn’t have any problems with it falling off or getting torn in the blades. And don’t overfill the basket, that is a big no no.
The best pro feature about the Almond Cow is that it is so easy to clean.

You have to be careful not to get water in the head where the motor is, but otherwise, a quick rinse with a light sudsy sponge is all that is needed to keep all the parts clean. And you can store it all together, so it doesn’t take up too much space in your cabinet.
As far as cons go,
I think what I just mentioned is the worst of it. The only other thing, which i would think should have been resolved by now, since it’s been over a year, is the time it takes to receive your order. Mine took over 3 months to arrive. I was getting pretty antsy about it, but it finally arrived, just before Christmas last year, 2019. I figured it was because the company was new and they couldn’t keep up with manufacturing.
Now, though, I see people complaining on Facebook about it still taking a long time to arrive. Not sure what that’s all about, but it seems to me that the company should be addressing this problem ASAP!
Going from there, I will tell the tale of my everyday “Cow” use. This is what I do about every three or four days.
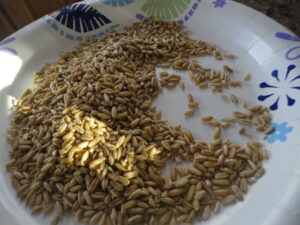
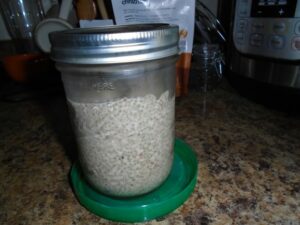
On the day I make milk, I soak my nuts in the morning. My favorite every day milk is Almond-Oat. I soak a heaping 1/2 cup of raw almonds with 2 tablespoons of Oat Groats. I use the real oats, not rolled oatmeal, or steel cut, but the whole oat. See picture below.
I let this sit for 3 or 4 hours, I’ve even gone overnight if I didn’t get to making the milk that day. I put it in the fridge if that’s the case.
Then, this is where I do my thing. This works best for me.
First I make the milk. I add the drained, rinsed nuts and oats to the filter basket, and fill my Cow up to just under the maximum line with filtered water. I add a pinch of kosher salt, then put in the filter basket attached to the motor assembly. I run the cow either one or two cycles. It really depends on my mood. With the cow at max water level, if the cup is a bit overfull, sometimes it can overflow a bit of pulp while it’s running the 2nd cycle, but it doesn’t hurt anything. It’s just a little messy. It can also deposit some pulp in the milk and that’s where the next step comes in.
When it’s done, I filter the milk through a fine mesh strainer.
This is totally optional, the milk is just fine without doing this.
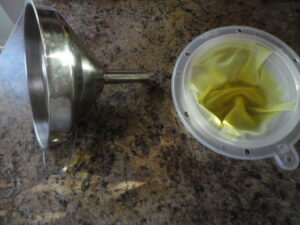
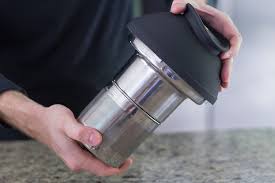
I use a kombucha funnel and a fine mesh strainer that came with it. See picture opposite. Pardon the yellow tint, it’s really white, I strained some golden milk through it and the turmeric stained the filter yellow, oh well! I put the filter into the collector cup to drain while I strain the milk. If you tilt it, the milk will drain through.
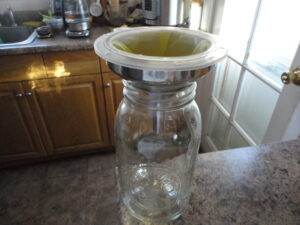
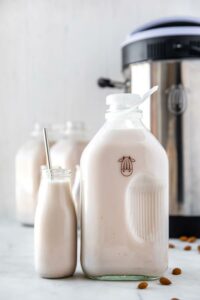
I use a 2 quart Ball jar to store my milk which I find is much easier to clean than the glass bottle that Almond Cow offers. Although it’s a very cool bottle and I was feeling a bit nostalgic, I bought one when I first purchased my Cow. It now sits on a shelf in my basement. My bottle brushes just didn’t clean it well. AC now offers a special brush for their bottles, but too late for me, and I’m not buying one! No need, although they now have the pint bottles which I may purchase someday. They remind me of the glass bottles we had milk in at school when we were kids.
Straining the pulp takes a little time but it’s worth it.
When straining, the pulp will clog the strainer rather quickly, so I use a plastic spoon (so as not to rip the strainer) to stir it around to get all the milk out faster, otherwise, you’d be waiting a very long time for the milk to drain as you have to do it in batches. So this is where I found a use for a little bit of the pulp. The
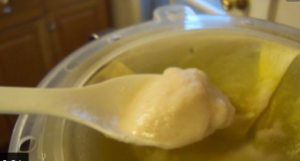
pulp that comes out of the strainer is really fine, it’s what came through the Cow’s filter and causes most of the “grit”.
Now here’s my secret, and when I really fell in love with Chia Pudding.
Each time I make milk, I make a pint of Chia Pudding at the same time, which lasts me until I need to make milk again. Funny how that works out! For no mess cleanup, I make the pudding right in the jar I store it in.
I add about 3 tablespoons of this fine pulp into the jar with the milk for the pudding. I found that this makes the pudding a little richer and creamier, plus adding a protein and the nutrient boost to the pudding. I then just finish straining the rest of the milk and pop it in the fridge. Done!
Go here to get the full recipe for my Easy Chia Pudding.
This is where I can segue right into my feelings on the use of the pulp.
After experimenting with many recipes, I have found that I really don’t like the pulp at all!! One of the selling features of the Almond Cow and making your own nut milks in general, is that you can use the pulp either just to eat, or in recipes, therefore, no waste! This was a huge reason I bought a Cow.
Well, I gotta tell ya, I have not had much luck with this stuff at all! I thought this would change my life, because I really don’t like to throw anything out. Boy was I wrong!
I just want to note here, that this has absolutely nothing to do with the Almond Cow itself, the pulp is a whole other matter of its own.
I really tried to like the pulp!
When I first started making milk, I brought a “pulpmeal” bowl to work for breakfast. I made it with my usual Overnight Oatmeal stuff, cinnamon, dried fruit, and a bit of Monk fruit sweetener, I figured it would be just like it. No, it was nasty. I just couldn’t get past the texture. I found it completely undesirable. So I threw it out.
Not one to give up, because apparently, a lot of people really like it, I tried adding some to overnight oats, as oats are my jam. I figured the oats would change the fine texture of the pulp and make it edible. I couldn’t eat it, that went in the trash. After a few more tries, I gave up on the idea that it would be a great substitute, or addition to my beloved oatmeal.
The Almond Cow website offers many recipes for uses with the pulp in cookies, muffins, cakes, soups and such.
The majority of these recipes are submitted from people just like me, who made up something edible. I guess they are all “tried and true” except in my kitchen!
This is where I totally don’t get what my problem is.
On a regular basis, before pulp adventures, I successfully make pancakes, muffins, cookies etc., but give me some pulp and add it to these and it’s a flop every time! I tried adding some to a tried and true pancake recipe that I use very often, and the pulp just ruined them. They stuck to the griddle, and basically disintegrated on me. They made such a mess!
I tried adding some to a quick bread recipe, it looked beautiful when I took it out of the oven, when it cooled, it completely sunk and when I cut it open it was just a mess of uncooked mush. And yes, I checked it with a toothpick and even over baked it a bit knowing that something was going to happen! Cookies just turned to mush, and didn’t bake right, or they come out very cakey, but they fall apart. I know this is too much moisture. Muffins and baked donuts just end up a dough pile of yuck! (Best description I could come up with!)
I’ve tried adjusting the other liquids in the recipe, adding more flour, nothing seemed to work. I didn’t take pictures because my heart was broken! I don’t know what I’m doing wrong. Maybe you really have to dry it out more. There is nothing that says this though. Maybe a more in-depth instruction on what exactly to do with the pulp before using it?
That is just a handful of my failures, I have however, since then, found a couple uses for the pulp that I really like!
My first of course, is the Chia pudding, unfortunately, that doesn’t use very much pulp and only the second sifting. The regular coarse pulp doesn’t
give the same results. So there is still a lot to deal with.
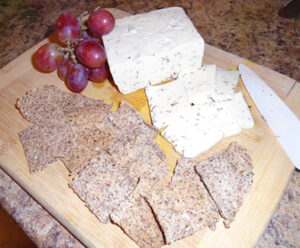
I did come across a recipe for crackers that is really good. I have made these crackers many times, and they come out great every time! They are a bit delicate, (I may roll them too thin but I found if I rolled them any thicker, they didn’t crisp up well) so I took the recipe and tweeked it to my own taste. Here is the link to that recipe, and here is my cracker recipe. I think they come out so good because all the moisture is baked out of them.
I tried the Marbled Heart Cakes recipe, and they actually came out really good! I made them in large muffin cups and were okay! The gravy recipe is also yummy, however, it calls for milk, not pulp.
I use the cow to make non dairy cheese.
Well I should say, to make the milk for the cheese. Many “cheese” recipes call for Almond or Cashew milk so they are really easy to make in the Cow.
My other favorite milk is Soy milk.
Now, soy milk is a little more involved than the other milks because it is made from an uncooked bean. Soy milk takes a little planning. You also have to soak the beans overnight, a short soak just won’t do. The next step, and one you can’t overlook, is to cook the milk for about 20 minutes to remove the beany flavor. This means standing over it while it cooks so it won’t bubble over, and you also need to stir and skim it often. I have discovered another short cut in this by using my Instant Pot, “My other favorite kitchen tool.” You can just set it and forget it, it works like a charm!
I soak one cup of dried soy beans over night.

In the morning, you have about three cups of soaked beans. So you have to make your milk in batches because you can only use one cup per recipe for milk or your Cow will get very angry with you. I fill my cow up to the max line with filtered water. I don’t add salt yet, that comes later. I use a rinsed cup of soaked beans and run it for one full cycle. After it’s done, I leave the milk in the cow, and put the pulp into a strainer to drain while I rinse the cow’s strainer and add another cup of beans. I repeat the cycle.
After the second cycle, I pour some of my milk, about half, into the Instant Pot and add fresh water to the max line. I add another cup of beans and run another full cycle in the cow. This should use up the beans, if not, just dump out the pulp into your strainer and run the rest of your beans. You can run each cycle twice if you like. Now you should have about 2 quarts of milk. As I work with the pulp, I pour it into a strainer to use later.
I pour it all into my instant pot, and run it on Manual cycle on high for 30 minutes. Allow the pot to depressurize naturally, this could take a half hour. If you try to depressurize right away, milk will probably go spewing all over your kitchen! Taste the milk, if it’s still got a beany flavor, cook it for another five minutes. Keep tasting until you like the taste. Yes, it takes a while, but it’s a labor of love and well worth it. Soy milk comes out much more creamy than the other milks. It’s my first choice for most baking recipes too!
Once you are happy with the way it tastes, add a good pinch of salt and stir well. This is when I strain it through the mesh strainer. Then I put it in the fridge. Soy milk is so good, and it doesn’t separate out as much as the other homemade milks do.
The pulp left over from making soy milk is beautiful white stuff and is called Okara.
Japanese folks use this pulp in many ways.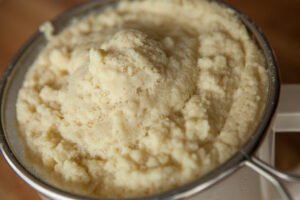 I found it really hard to throw out the pulp from my soy milk.
I dried it in the oven on a sheet pan lined with parchment. It takes a while, (as mentioned in other posts, I don’t have a dehydrator), a few hours at least. After it was dry, I stored it in a jar and use it as protein powder in smoothies. I liked it better than pea protein, which I find is a little gritty. It is completely tasteless, and mixes with any type of smoothie.
I also found an awesome recipe by Chef Miyoko Schinner for chicken nuggets using the Okara, and they are delicious. This recipe can be found in her cookbook, The Homemade Vegan Pantry.
You could whip the dried Okara up in a blender to make soy flour also. That can be used to bread fish or chicken, or used to boost the protein in recipes like gravy. It makes great Cauliflower Wings or Squash Fingers!
Moving on to other tricks the Almond Cow can do.
You are not limited to only nuts and seeds when making beverages in the Almond Cow. You can also use fruits and vegetables to the basket and make drink like Lemonade and Apple Cider, which came out really yummy. I made cider and reduced it down to make baked cider doughnuts. The pulp was beautiful, it looked like applesauce. I toyed with some ideas for it. I cooked it up with more spices and sugar to make apple butter, but it didn’t work. I was really excited about this figuring it would be so healthy with the apple skin and all that fiber too! It was just missing something. I’ll figure it out!
I just came across a recipe for vegetable broth which I will be trying, just have to figure out what to do with the pulp. That’s something I can wrap my head around. Maybe a veggie meatloaf, or as a sofrito for a rice dish or a nice thick bean soup? I’ll update on that.
 You can also make fruity cocktails, lemonade, hot chocolate and coffee drinks. I don’t drink alcohol so I have not tried the cocktails, but I did try hot cocoa and lemonade. I didn’t like the hot chocolate at all, I’ll stick to making that on the stove, the lemonade was good, but only make it if you are serving a few people who will drink it right away. It didn’t keep well in the fridge overnight, it turned bitter. Other and that, the sky’s the limit when it comes to ideas with the Almond Cow.

I hope I’ve answered some questions for new comers to the Almond Cow world. It’s a great addition for any kitchen to save money and the planet. I will continue to use my cow and love it.
If anyone knows how to love the pulp, I’d love to hear from you!
Thanks,
Jeanette

